How a Book Is Made
Ever wonder what goes into creating a book? Here’s a breakdown of the steps we take to bring a book from concept to bookshelf.
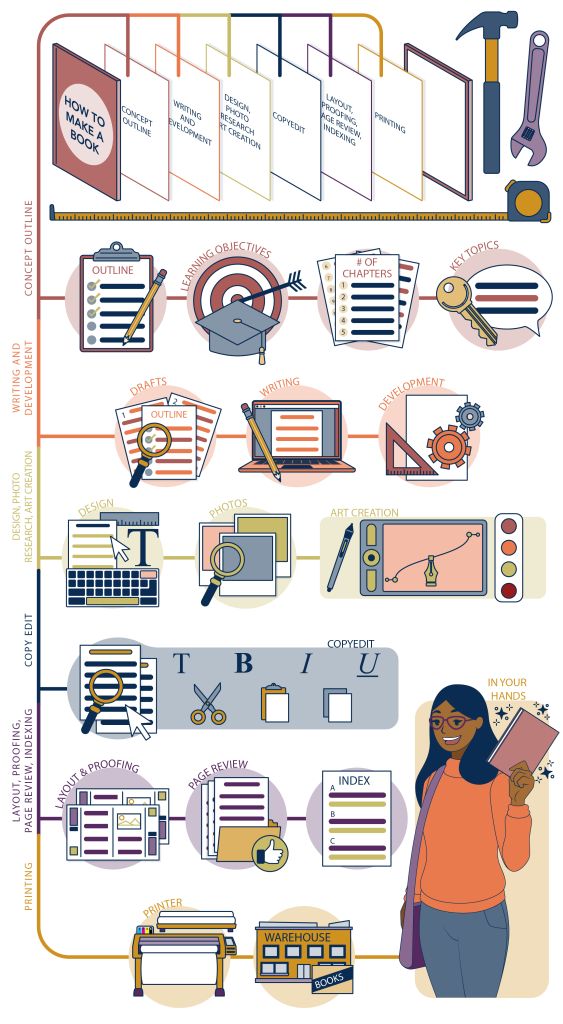
Concept Outline: We start by engaging the author in a discussion of the topic of the book. We ask questions like: What are the key topics that must be covered? What are the learning objectives? What order should the material be taught in? How many “chunks” (or chapters) should the material be separated into? What is the average reading level of students for this course? How do students who take this course learn best? What is the outcome you want from a student after reading this text? (For example: Should they understand a topic? Pass a test? Teach others? Or gain a certification?) From these questions, we start to unravel how the book might be organized, what topics will be discussed, and what the overall goal of the book is. We create a concept outline, basically a table of contents for the book that will guide us through the rest of production.
Writing: This is generally the most time-consuming part of the process. Here, the author has to put pen to paper (or fingers to the keyboard) and write it down! Writer’s block is a real thing, but the concept outline that was created, along with setting schedules and goals, helps to keep authors on track. During this phase, we’re not worried about making everything perfect. We want to make sure we capture all the information that is needed for the book. More is always better here; we can cut things later, but it’s far more time consuming to add things later in the process. We often advise authors to “word vomit” during this phase, and we’ll sort it out in the next phase.
Development: During this stage we may take one, two, three, four (or more!) passes of the content to look for areas of improvement. What we focus on here is making sure that the content aligns with the concept outline we created at the beginning, as well as making sure that the content pushes the reader to the ultimate goal we set for the book.
Design: This is the fun part! This is where we get to decide how your book will look. What colors to use, what fonts, how photos will appear, how all the pieces and parts of your book come to life and look in a reader’s hands. Our team of designers will work to ensure a beautiful design that helps aid a reader in comprehension of the material. The cover is also designed in this phase; it’s the face of the book and has to look great and capture the essence of the words inside.
Photo Research and Image Creation: If images are essential to the comprehension of materials, we take time to pair the correct imagery with the text itself. This might include the creation of graphics (think flowcharts or anatomy drawings), researching stock imagery, and/or taking our own photos to appear in the book. The imagery will be paired with the text in the final design.
Copyedit: Once the manuscript is finalized and through the development process, it goes through a thorough copyedit. This is where we dot all the i’s and cross all the t’s. Our editors check spelling, punctuation, grammar, and readability.
Layout and proofreading: Once the design is final, the images are chosen, and the manuscript is through copyedit, it’s time to make it look like a book! During the layout and proofreading phase, our designers will “page” the book. They will lay out each page, pairing images with the text and adhering to the design to make sure the look is cohesive throughout. Then, the pages go through a proofread to check for typesetting errors.
Page Review: This is the time for the author to have a look at the real pages of the book. We go through several rounds of page review between our team and the author. This is a chance for the author to see the text and images within the context of the design. We will go through multiple rounds of review and revision to ensure we have everything just right.
Indexing: While you may not think much of an index of a book, it is an essential guide for students to find relevant information during their course. During the indexing phase, the index of terms and page numbers is created to help guide the reader through the book and provide easy references to key topics.
Printing: Once the book is in its final form, it’s ready to hit the printer! We find a printer that best fits the needs of the project and take care of prepping the final book files for press. Once books are printed, they are shipped to the warehouse where they are available for purchase.
So, there it is! A snapshot of the publishing process.
Interested in learning more about becoming an author with August Learning Solutions? Visit our Author Partnerships page by clicking here and fill out the form to start a conversation with one of our custom publishing editors!

